


")


A LONG TIME COMING. If you’ve been following along, you know this has been a 6 YEAR DEBATE – To paint? To not paint? To grout? To not grout? Let’s just say I am a happy girl now! I am so thankful that I decided to do this instead of painting – thank you to all you ladies who said DON’T DO IT and of course my dad who might have disowned me if I did. 🤣
Don’t worry, I have written down EVERYTHING – tips, tricks, mistakes to avoid. All of it.
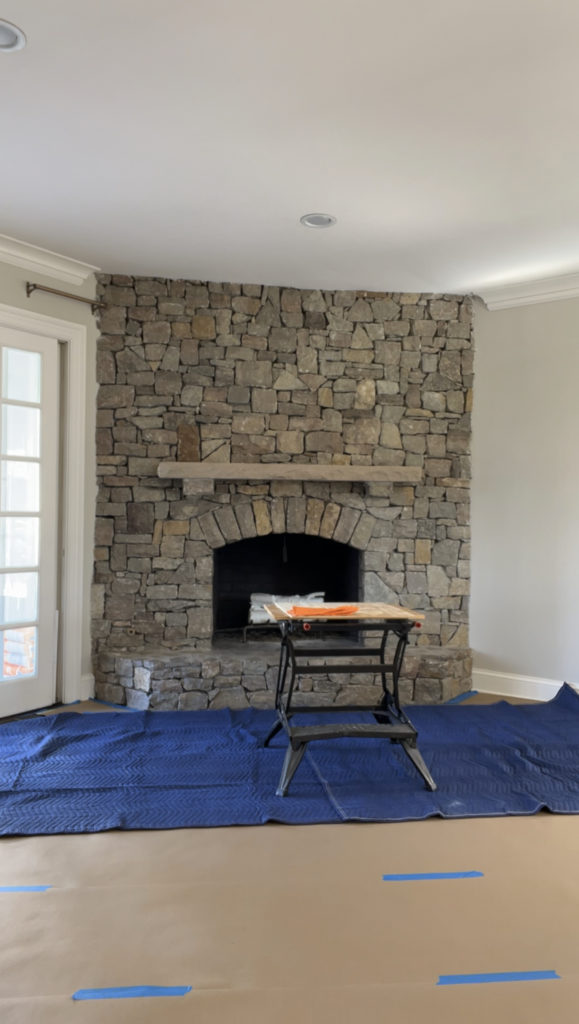
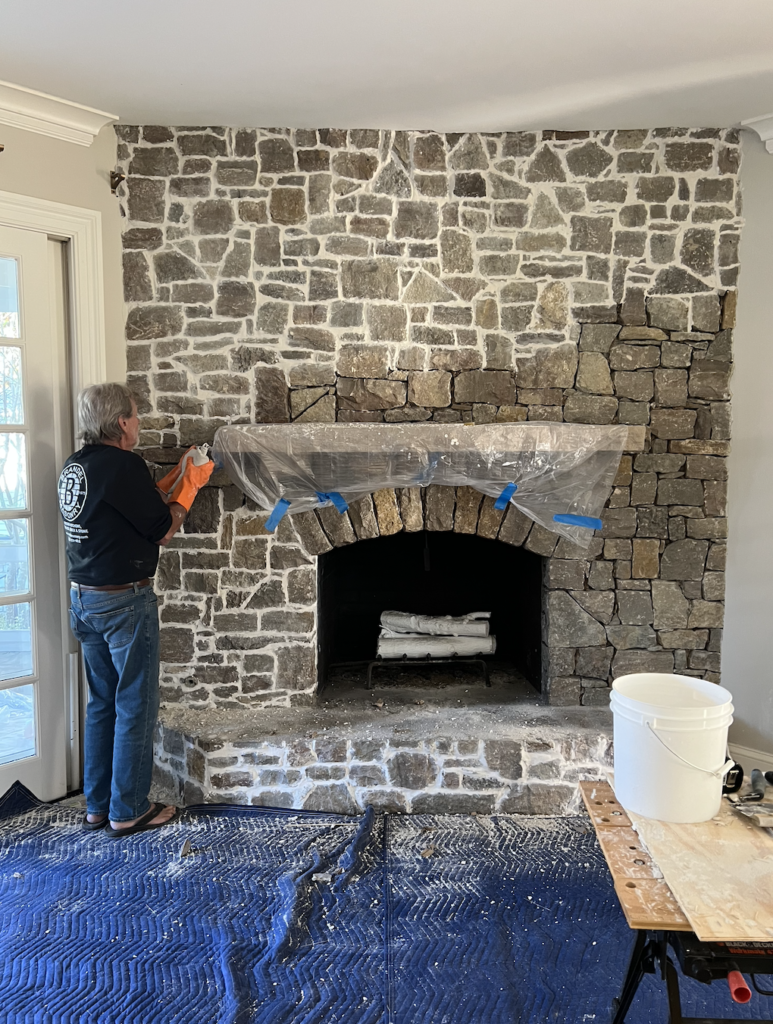
We moved into this house almost 8 years ago, it was built in the early 40’s, so you can imagine everything this fireplace has seen. I have always wanted to add a little brightness + warmth to my kitchen. I was first inspired through Chris Loves Julia – they did this to one of their fireplaces. Once I saw that this was an option, I was sold. I talked it through with my dad, and he agreed to come up to get this project started!
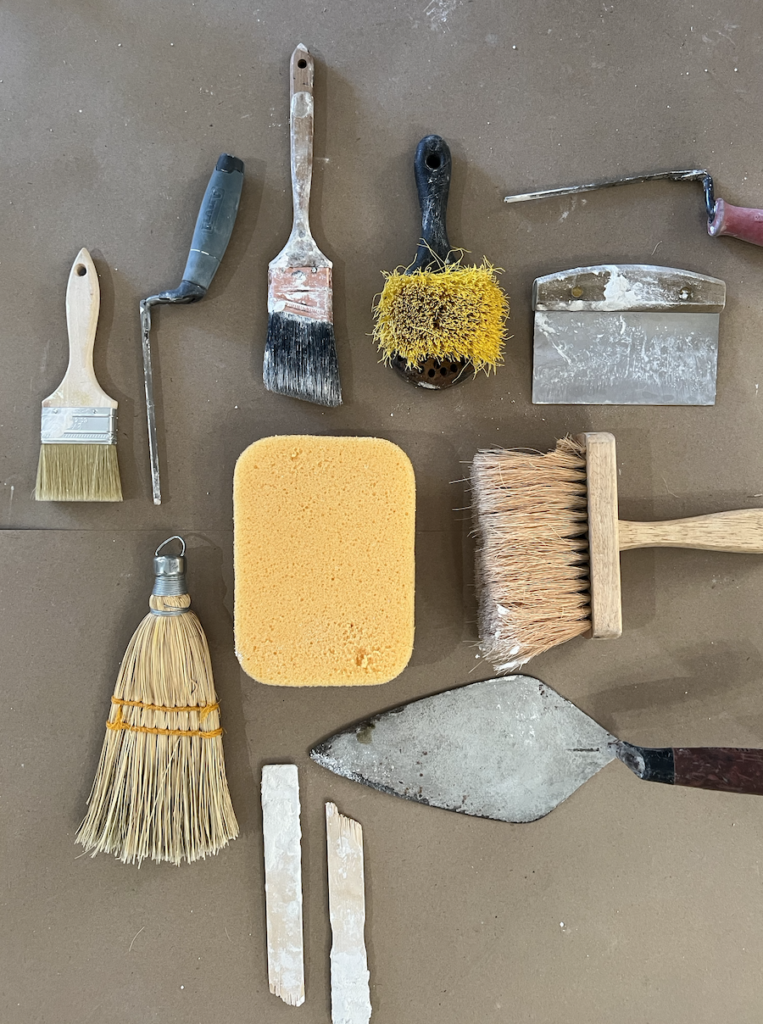
SUPPLES
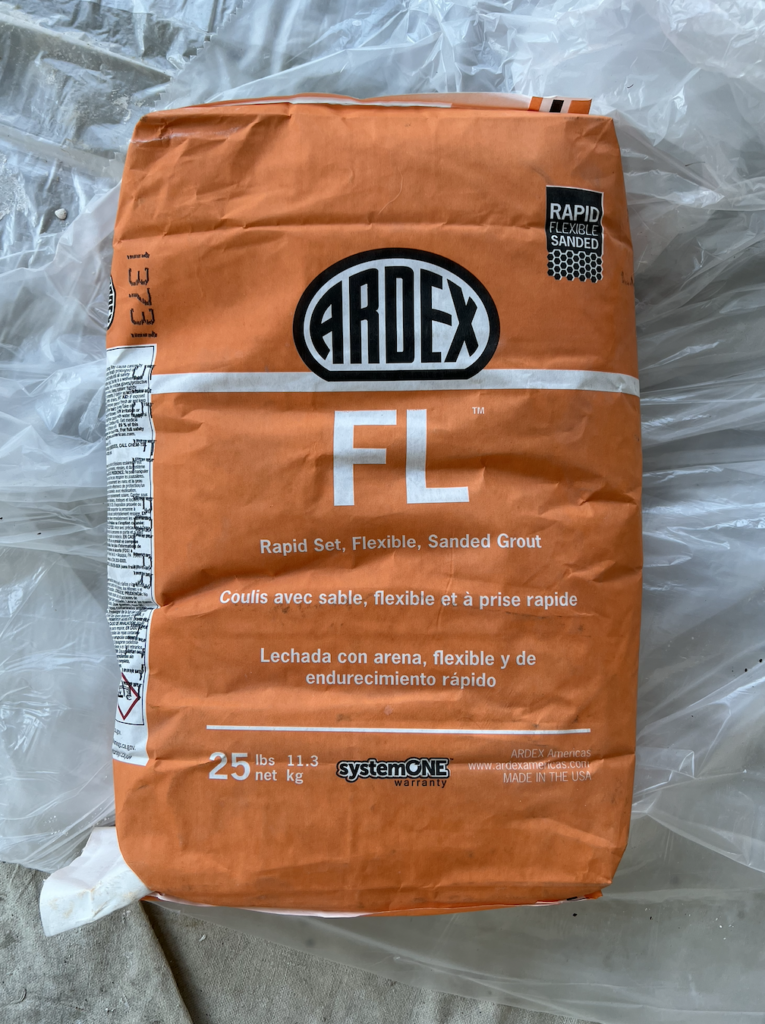
Ardex America’s Grout – Color: Polar White
Egg Beater Mixer (this will attach to your drill to mix)
Contractor Trash Bags
Large Drop Cloth or Painters Tarp
Large Roll of Kraft Paper
Tuck Pointer
Small Work Table – It was nice to have a place to be able to set all of our tools that we needed
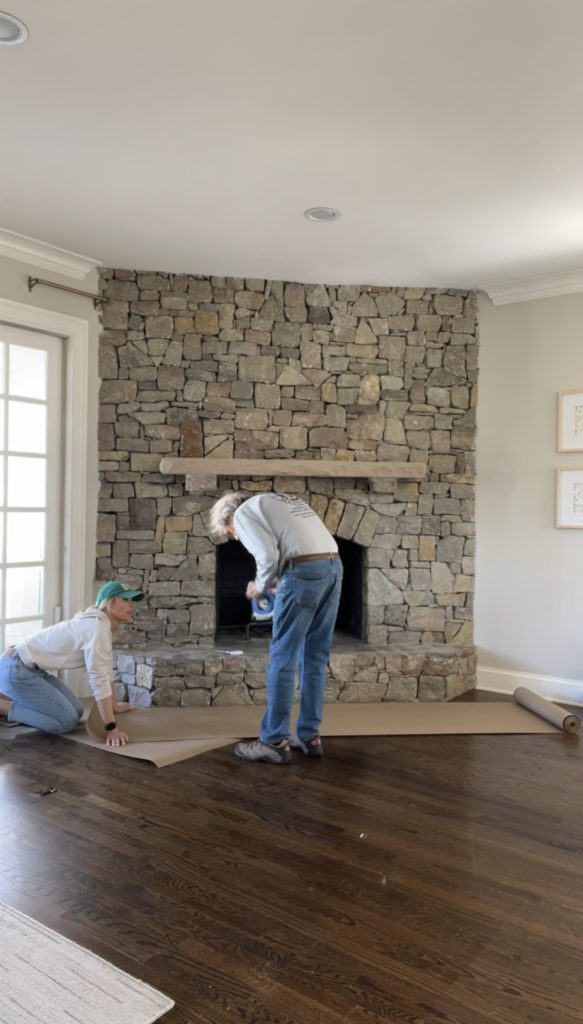
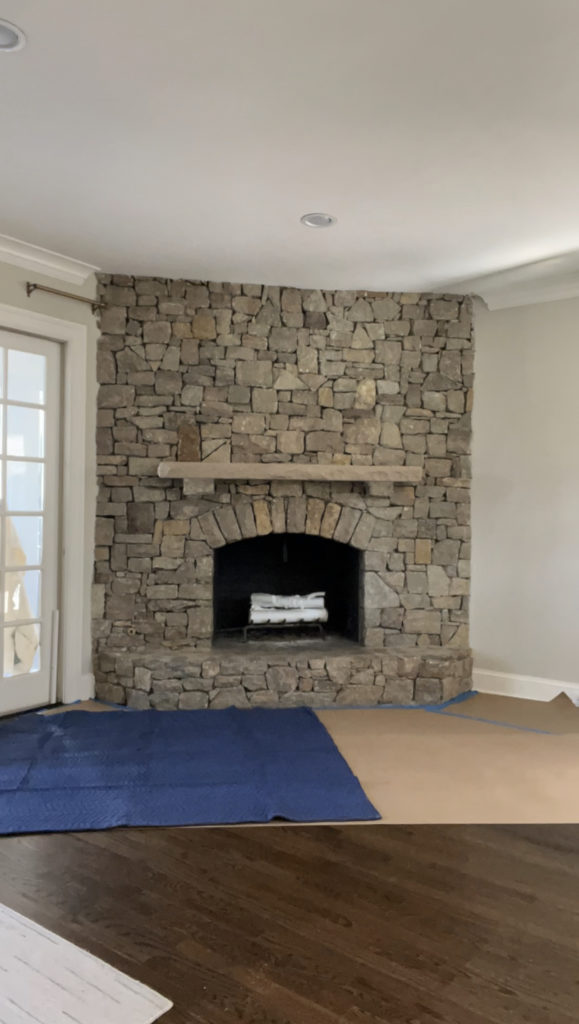
PREP
Make sure to prep your area well before you start getting crazy with the grout. We used brown Kraft paper and secured it with painters tape. We also laid down a few heavy moving blankets as well – This helped a bit for comfort when we were piping the bottom of the fire pace. A small work table was also super helpful to have close to set tools on etc.
As for cleaning up, it was not overly dusty which was nice, be mindful of your shoes coming in and out. BUT it did wipe off our drywall pretty easily.

MIXING YOUR GROUT
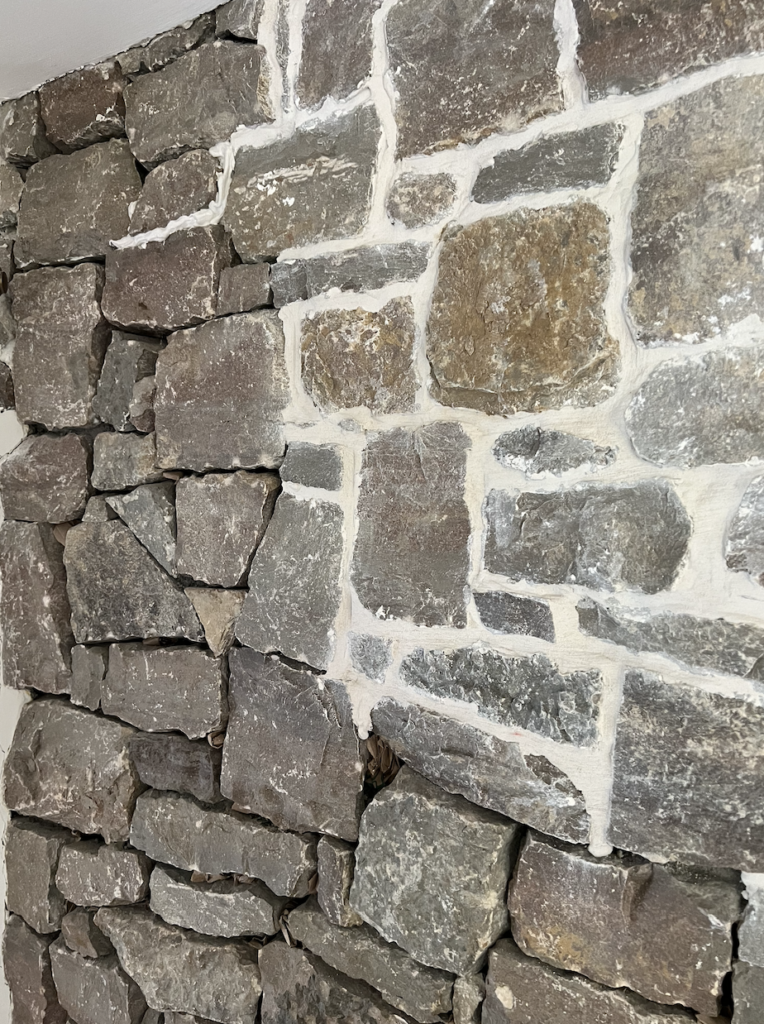
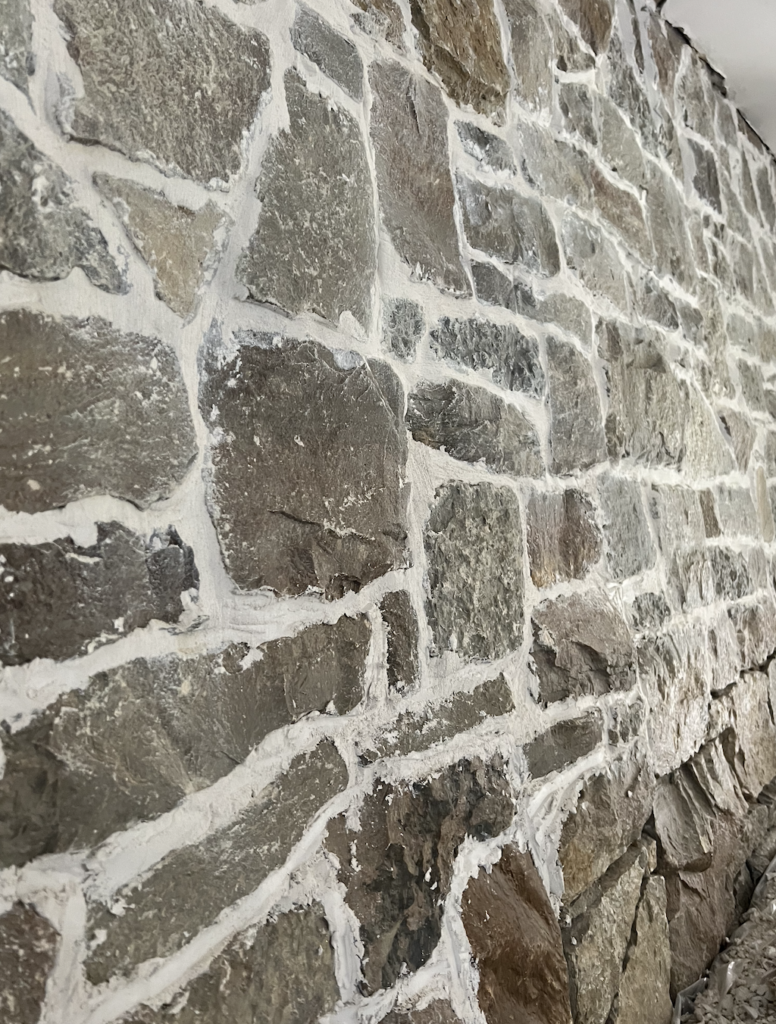
The Tile Shop is where we picked up the grout, which is great because the grout comes in colors. This is key because Home Depot and Lowe’s only sell grout in a stark white and you have to mix your color in (not worth the hassle, because it’s like baking – If you don’t have the exact amount of dye mixed in for each batch – then your fireplace could end up not looking consistent) The Tile Shop had everything we needed already mixed, we just had to add water (Like Hungry Jack just add water pancake mix 🤣) We have warmer stones and neutrals in our kitchen. I knew that I did not want a stark white. We tried a bunch of grout samples from The Tile Shop and it was great to sit back and compare the different colors. This is what we ended up going with: Ardex America’s Grout – Color: Polar White
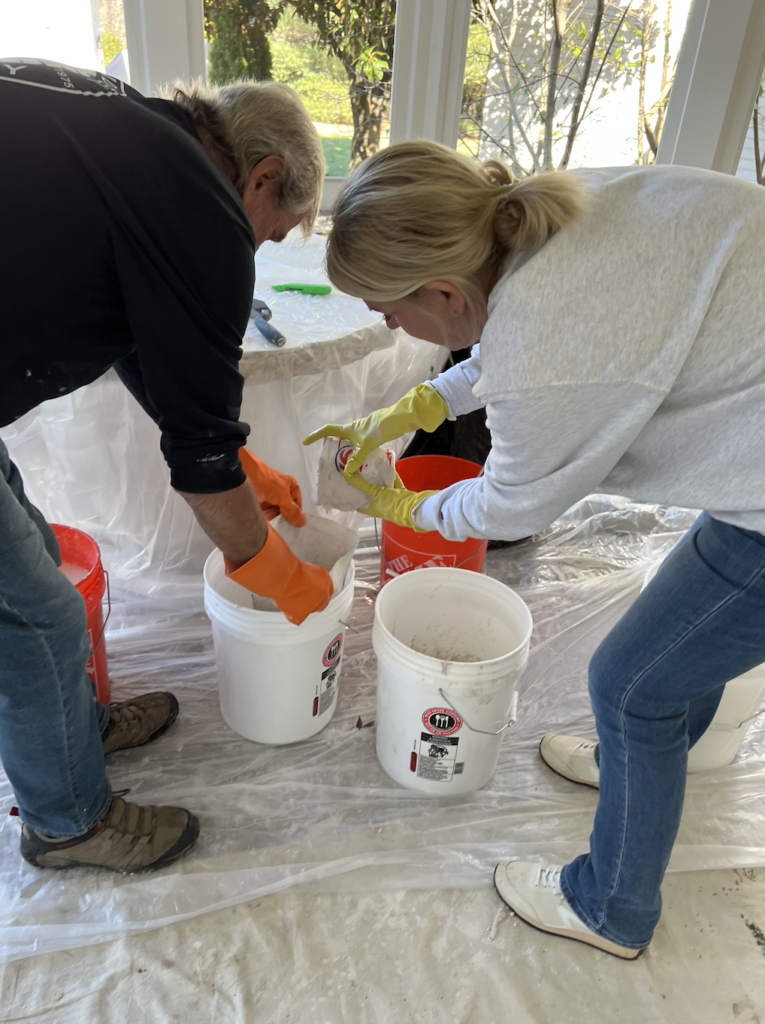
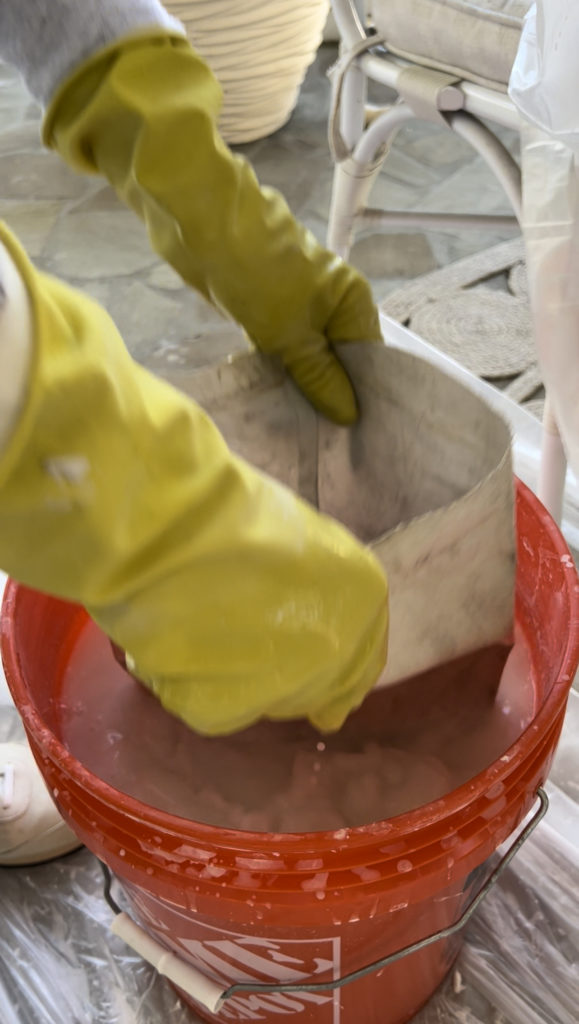
Make sure you have all of your buckets ready – 1 bucket for mixing, 1 bucket for clean water and 1 bucket to clean your piping bag. We used this egg beater mixer that attached to the end of our drill to mix the mortar in the bucket. Mix. Outside. It will be so much easy for any type of mess.
For context: our fireplace is about 10X10 FT + stacked stone
KEY TAKE AWAYS:
You only want to mix about 1/3 of your mortar at a time. We would suggest working in 2ft sections (the full process- from mixing to using the whisk broom) before heading to the next section. Remember, whatever grout you mix, you have to use right away before it sets.
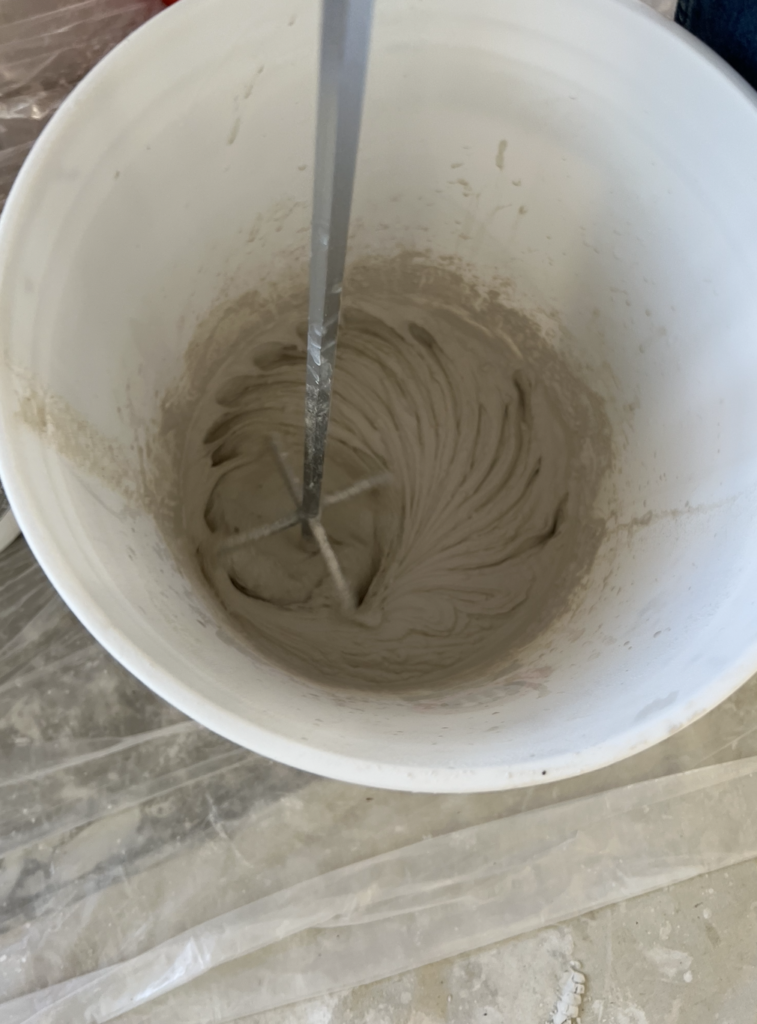
You are looking for a toothpaste consistency, this will help with piping.
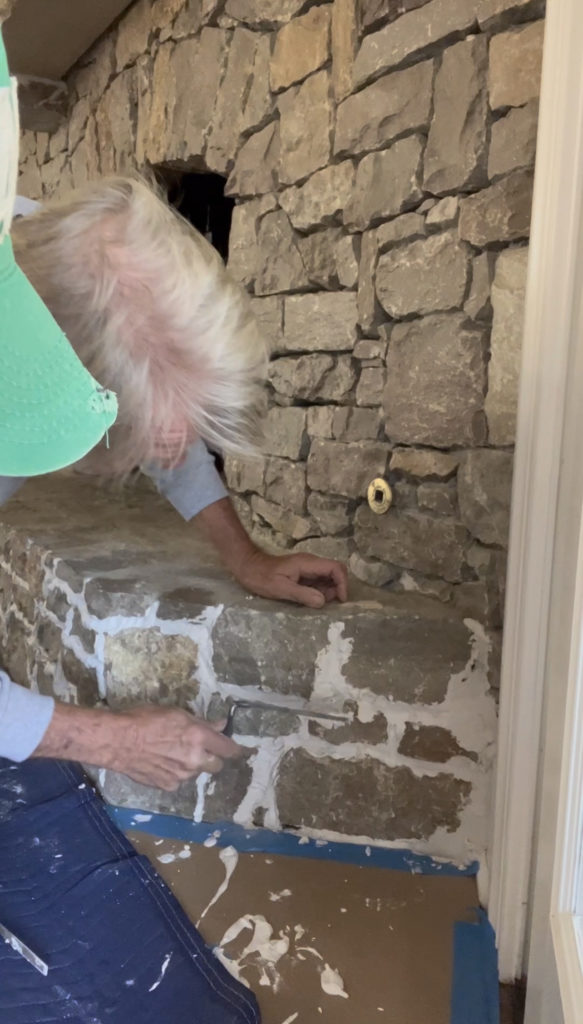
PIPING
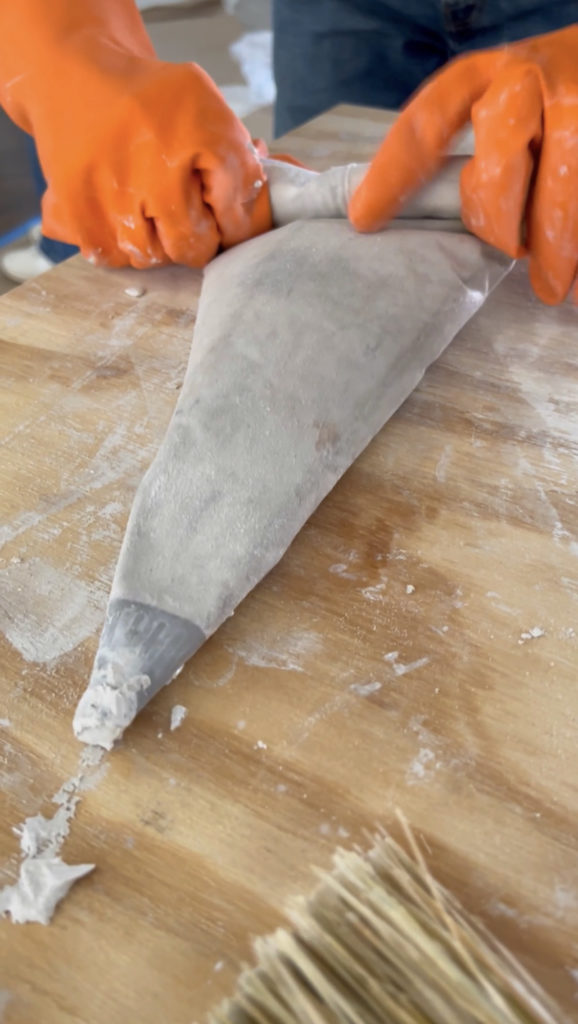
After you’ve mixed your mortar, make sure you put on a really good pair of rubber gloves. Before you fill your pipping bag with the grout, you always want to make sure your bag is prepped. You do this by dipping it into the bucket of water a 2-3 times so it’s moist on the inside + outside. Make sure to fill the pipping bag A LITTLE LESS THAN HALFWAY –
1. You want to roll the end of the bag tightly and you don’t want any spilling out
2. The grout gets pretty heavy to hold.
When filling the bag, my dad used a small scrapper knife to smooth out the grout to the end of the piping bag before rolling the ends of it.
To be honest, it took us about 4ish sections to figure out exactly what we wanted – I know I’ve said the before but the consistency of your mortar needs to be like toothpaste, really work on that. You’ll get the hang of piping, it gets easier as it goes! Before you refill the mortar you will want to make sure to rinse the bag AGAIN because the mortar will start to build up and harden – You don’t want anything to block you opening.
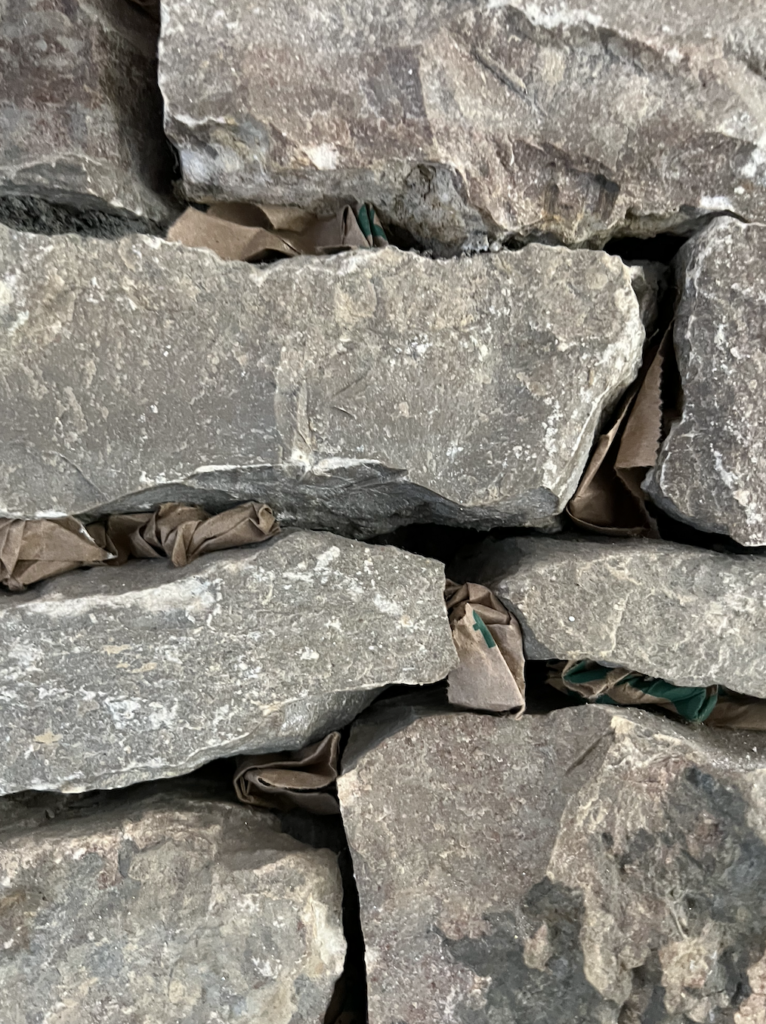
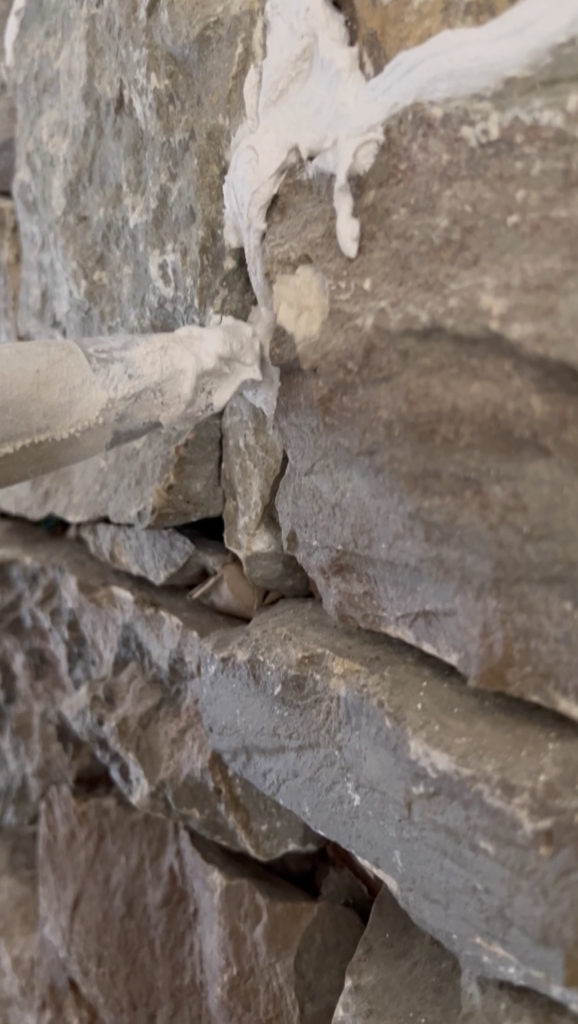
We started at the bottom of the fire place to get the hang of it, that way it was an easier place to hide if we did make a mistake. It was definitely good practice! If you do have deeper joints, we took brown paper bags grocery bags, tore pieces, balled them up & stuffed them in to the joints… that way we were not wasting a ton of grout when we were piping those areas.
FINISHING TOUCHES
To keep the look we have, we would suggest not filling them too much because you don’t want mortar to end up running down the fireplace. We did use a quick set grout, and it sets up in about 30 minutes. We piped the mortar into joints, let it set for about 15 minutes and then we took the tuck pointer to manipulate the grout – you kind of push it and pack it in, like you are trimming it – don’t worry about making it look pretty just yet.
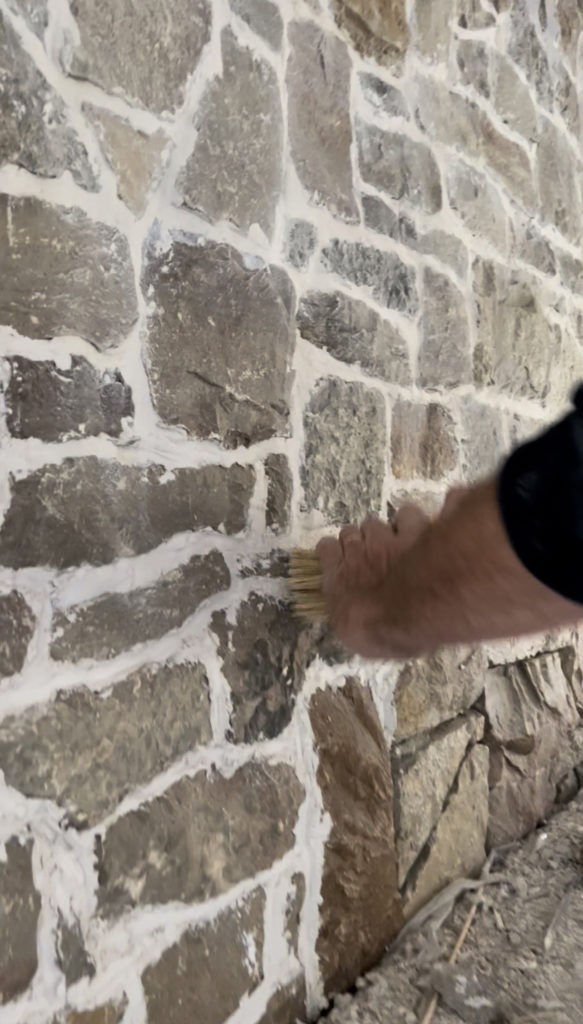
Then you’re going to wait another 10 – 15 minutes and you’re going to hit it again. This time I took the tool upright and went across the stone, you are almost like trimming the excess. Let it set a little bit more (be patient) and then you’ll take your whisk broom to it to give it that final look. IF the grout gets on the stone when you start using the broom, then you need to let your mortar sit a little longer. The longer you let it set up, you’ll get a clean look and a bit of a haze on the stone when you brush it. You’ll definitely need a little elbow grease for this, keep your broom in the joints and follow the joints – it really dusts off the stone. Now there were a few areas where we were sloppy – We took a sponge in clean water, scrubbed the stone really well and then took an old towel and blotted the stone – DO NOT DRAG THE TOWEL DOWN THE STONE.
Do not stress, I loved doing this project because it was pretty forgiving if you made a mistake or felt like you messed up.
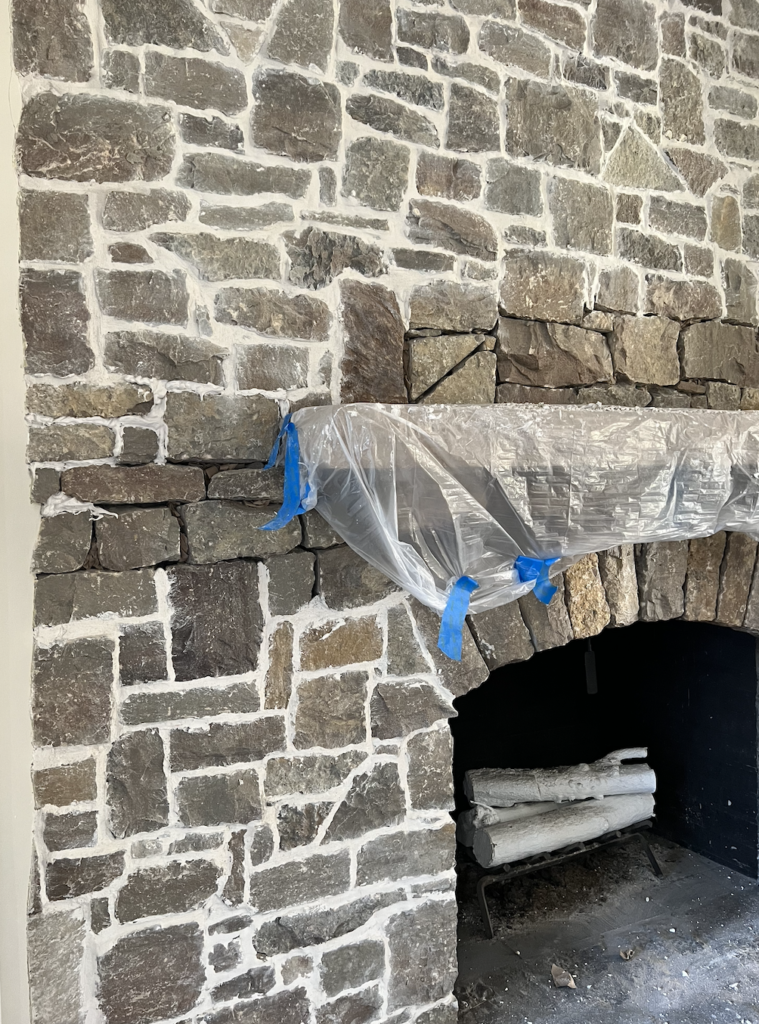

Every experience is unique – My dad has been doing this since he was 17 and he’s not 67 and we still had to play with it and figuring things out, but we had fun doing it! Honestly, you just don’t know till you start doing it. All in all, WOW – I am so happy. I cannot believe that it took this long to do it, but thank goodness I never painted it white – RIGHT? I’ll forever look at this fireplace and think of my parents, I’m so grateful for their help and spending this time with them. We had a LOT of fun. Please do not hesitate if you have ANY questions – Drop the comments below. Thanks for following along.
LOVE YOU. MEAN IT.
Xx,
LANDYN


Love it! Where can I find the paper art next to the fireplace?
It was a homegoods find 😭